The printer has no Wi-Fi or network port, it’s connected by USB to one computer, and others need to print to it? Windows 11 lets you share that printer on the network. The catch is that the computer it’s plugged into (the “server”) must stay on while others print.
In this article
Step 1: prepare the network on both sides
On every computer, the network should be private, with network discovery and file and printer sharing turned on. The walkthrough is in how to fix error 0x80070035 (step 2).
Step 2: share the printer on the “server” computer
- Open Settings › Bluetooth & devices › Printers & scanners and click the printer.
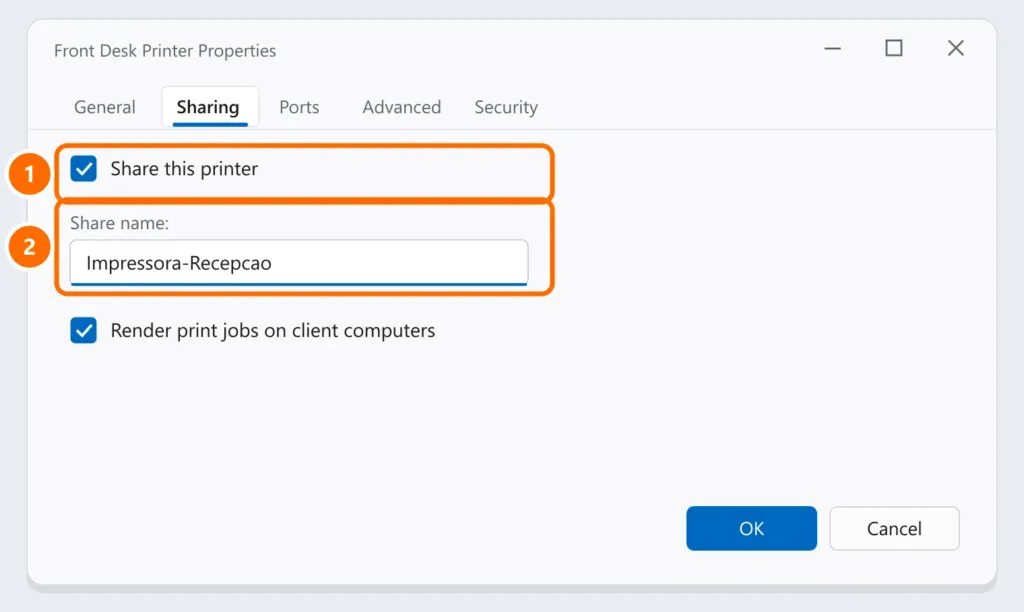
- Click Printer properties and open the Sharing tab.
- Check Share this printer and use a short name with no spaces or accents.
- Leave rendering print jobs on client computers checked and click OK.
Note the computer name (under Settings › System › About).
Step 3: add the printer on the other computers
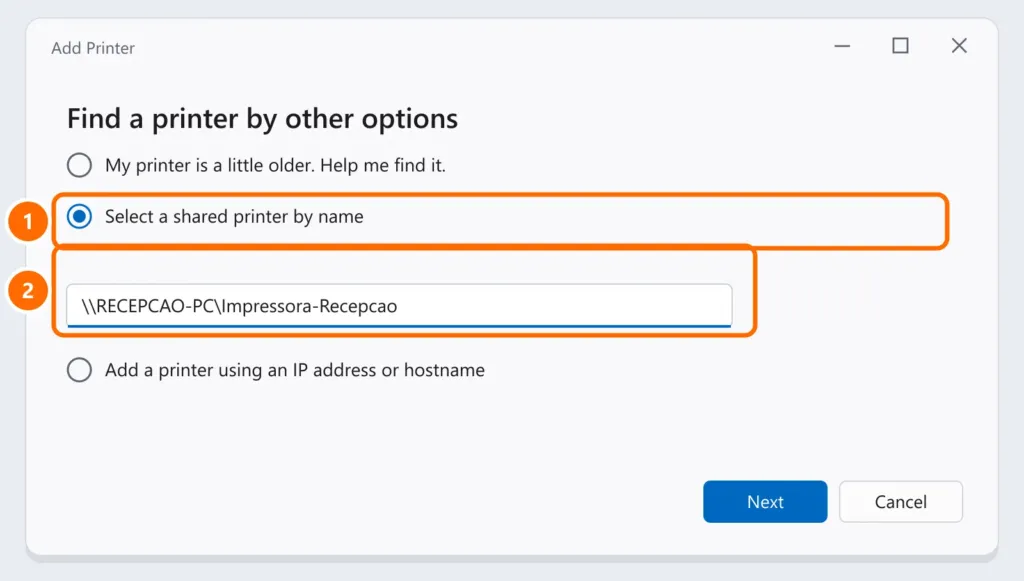
- Open Settings › Bluetooth & devices › Printers & scanners › Add device › Add manually.
- Choose Select a shared printer by name and type
\\PC-NAME\printer-name. - Click Next. Windows downloads the driver from the server computer (it may ask for an administrator password).
Step 4: errors 0x0000011b and 0x00000709
These errors appeared after Windows security changes to shared printing.
- Update both computers (server and client) in Windows Update and restart.
- Install the printer driver on the client computer before adding the shared printer, using the manufacturer’s installer.
- If it continues, use the server’s IP address instead of its name:
\\192.168.0.10\printer-name.
FAQ
Do I need to keep the server computer on all the time?
Yes, as long as others want to print. If it sleeps, the printer disappears for everyone else — adjust sleep under Settings › System › Power.
The shared printer shows as offline.
Make sure the server is on and reachable. The steps in printer offline also apply here.
Does it work with Windows 10 computers?
Yes. The client process is the same; keep both up to date.