A bootable USB drive lets you install Windows from scratch (a clean install), recover a PC that won’t start or install Windows on a new SSD. If all you want is to “wipe” a PC that works, there’s a simpler way, no USB drive needed: see how to reset Windows 11 without a USB drive.
In this article
Before you start
- A USB drive of 8 GB or more. Everything on it will be erased.
- A backup of your files: a clean install erases the drive. See the 3-2-1 backup rule.
- Your BitLocker recovery key, if the drive is encrypted: see BitLocker recovery key.
- Windows 11 requirements: TPM 2.0 and a supported processor. See Windows 11 requirements and TPM 2.0.
- Activation: on a PC that already had Windows 10 or 11 activated, the license is tied to the hardware and comes back on its own after the install, as long as you install the same edition (Home or Pro).
1. Create the USB drive
- On another Windows computer, go to Microsoft’s official website: microsoft.com/software-download/windows11.
- Under Create Windows 11 Installation Media, download the Media Creation Tool.
- Open the tool, accept the terms, and confirm the language and edition.
- Choose USB flash drive and click Next.
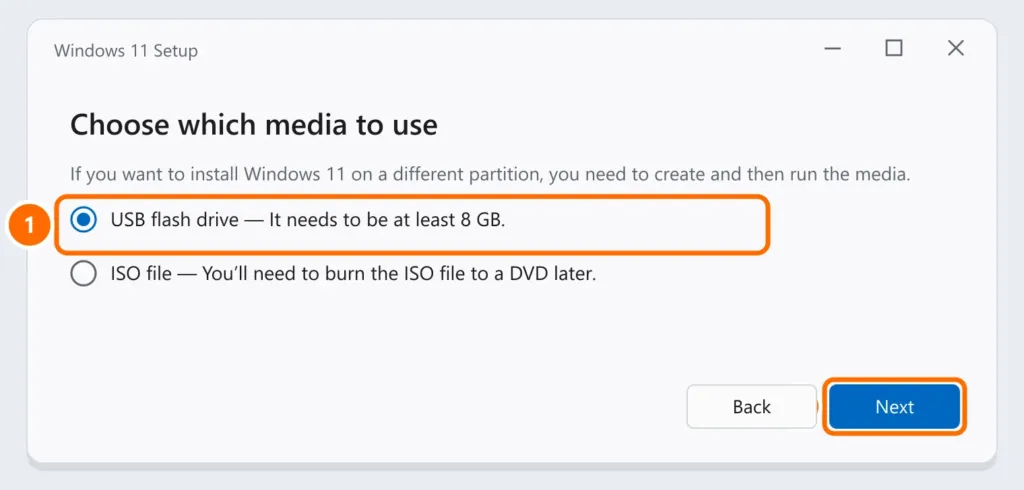
- Select the USB drive and wait for the download and write to finish (it can take anywhere from 20 minutes to over an hour, depending on your internet).
2. Boot the PC from the USB drive
- With the USB drive plugged in, turn on the PC and repeatedly press the boot menu key. It varies by manufacturer: F12, F11, F9, F8 or Esc are the most common.
- Choose the USB drive (it shows up as UEFI: USB drive name).
- If the USB drive doesn’t show up, go into the BIOS/UEFI and make sure booting from USB is allowed.
3. Install Windows 11
- Choose the language and keyboard layout (US for standard US keyboards).
- Under Select setup option, choose Install Windows 11.
- At the product key screen, click I don’t have a product key if the PC was already activated.
- Choose the same edition the PC had.
- In the list of drives, delete the partitions on the drive where Windows was and install to the unallocated space. Check the size so you don’t erase another drive with data.
- Follow the initial setup (network, account, privacy).
After the install
- Open Windows Update and install everything, including the optional driver updates.
- Check activation under Settings › System › Activation. See Windows not activated.
- Install drivers from the manufacturer’s website if something doesn’t work (sound, touchpad, Wi-Fi).
FAQ
The USB drive doesn’t show up in the boot menu.
Try another USB port (preferably on the back, on a desktop), recreate the USB drive and check in the BIOS that the mode is UEFI. If the USB drive isn’t recognized even in Windows, see USB device not recognized.
Can I use the same USB drive on several PCs?
Yes. The installation media isn’t tied to a computer; activation belongs to each PC.